


How to Remove a 5th Gen Toyota 4Runner Rear Bumper (2010-2024)
Watch the full video on YouTube
To remove the rear bumper on a 5th Gen 4Runner you need a 10mm socket on a ratchet and a trim tool or flathead screwdriver. On the truck in our video the bumper is held by 16 10mm bolts and 8 plastic push pins in three places: underneath, inside each rear wheel well, and along the sill under the liftgate. Take those out, pull each side away from the body, then lift the top edge over the liftgate latch hook and the bumper comes off in one piece.
We shot the video above on a customer's white 2012 4Runner. It runs eight minutes, and each step below links to the exact moment so you can watch the part you are stuck on.
What tools do you need to remove a 4Runner rear bumper?
A 10mm socket on a ratchet does every bolt on this bumper. Add a short extension for the bolts tucked up underneath, and a panel clip removal tool or a flathead screwdriver for the push pins.
- 10mm socket and ratchet
- Socket extension (you will see it in the bottom-corner shot)
- Panel clip removal tool, or a flathead screwdriver
- A box or cup for the hardware. You are putting all of it back on the new bumper.
- A few spare push pins, if you can get them. The truck in our video was already missing two before we started, one under the bumper and one in the wheel well.
We used a flathead in the video and it got the job done. Our video description does warn that you may have some trouble with a flathead, though, so if you own a trim tool, grab it.
Where are the 4Runner rear bumper bolts and clips?
Sixteen 10mm bolts and eight push pins hold it on. We counted them on camera, and they sit in three spots.
Underneath, each bottom corner has two bolts and a push pin, and there are two more bolts in the middle by the hitch. That's six bolts and two pins before you've stood up.
In each rear wheel well you'll find one bolt up top where the bumper meets the quarter panel, plus three push pins running down the edge. The video only shows the passenger side, but the driver side is the same.
The last eight bolts are across the sill under the liftgate: one at each corner by the taillights and six along the step pad. There's also a plastic cover over the latch hook in the middle of the sill that slides out before the bumper can come off.
How do you remove a 4Runner rear bumper, step by step?
Work from the bottom up: the underside first, then both wheel wells, then the top row under the liftgate. Once every fastener is out, pull the sides free and lift the bumper over the latch hook.
1. Pop the push pin at each bottom corner
Get under the back corner of the bumper, behind the rear tire. There is one push pin at the front edge of each bottom corner. Pry up the center with your trim tool or flathead and the pin pulls out.
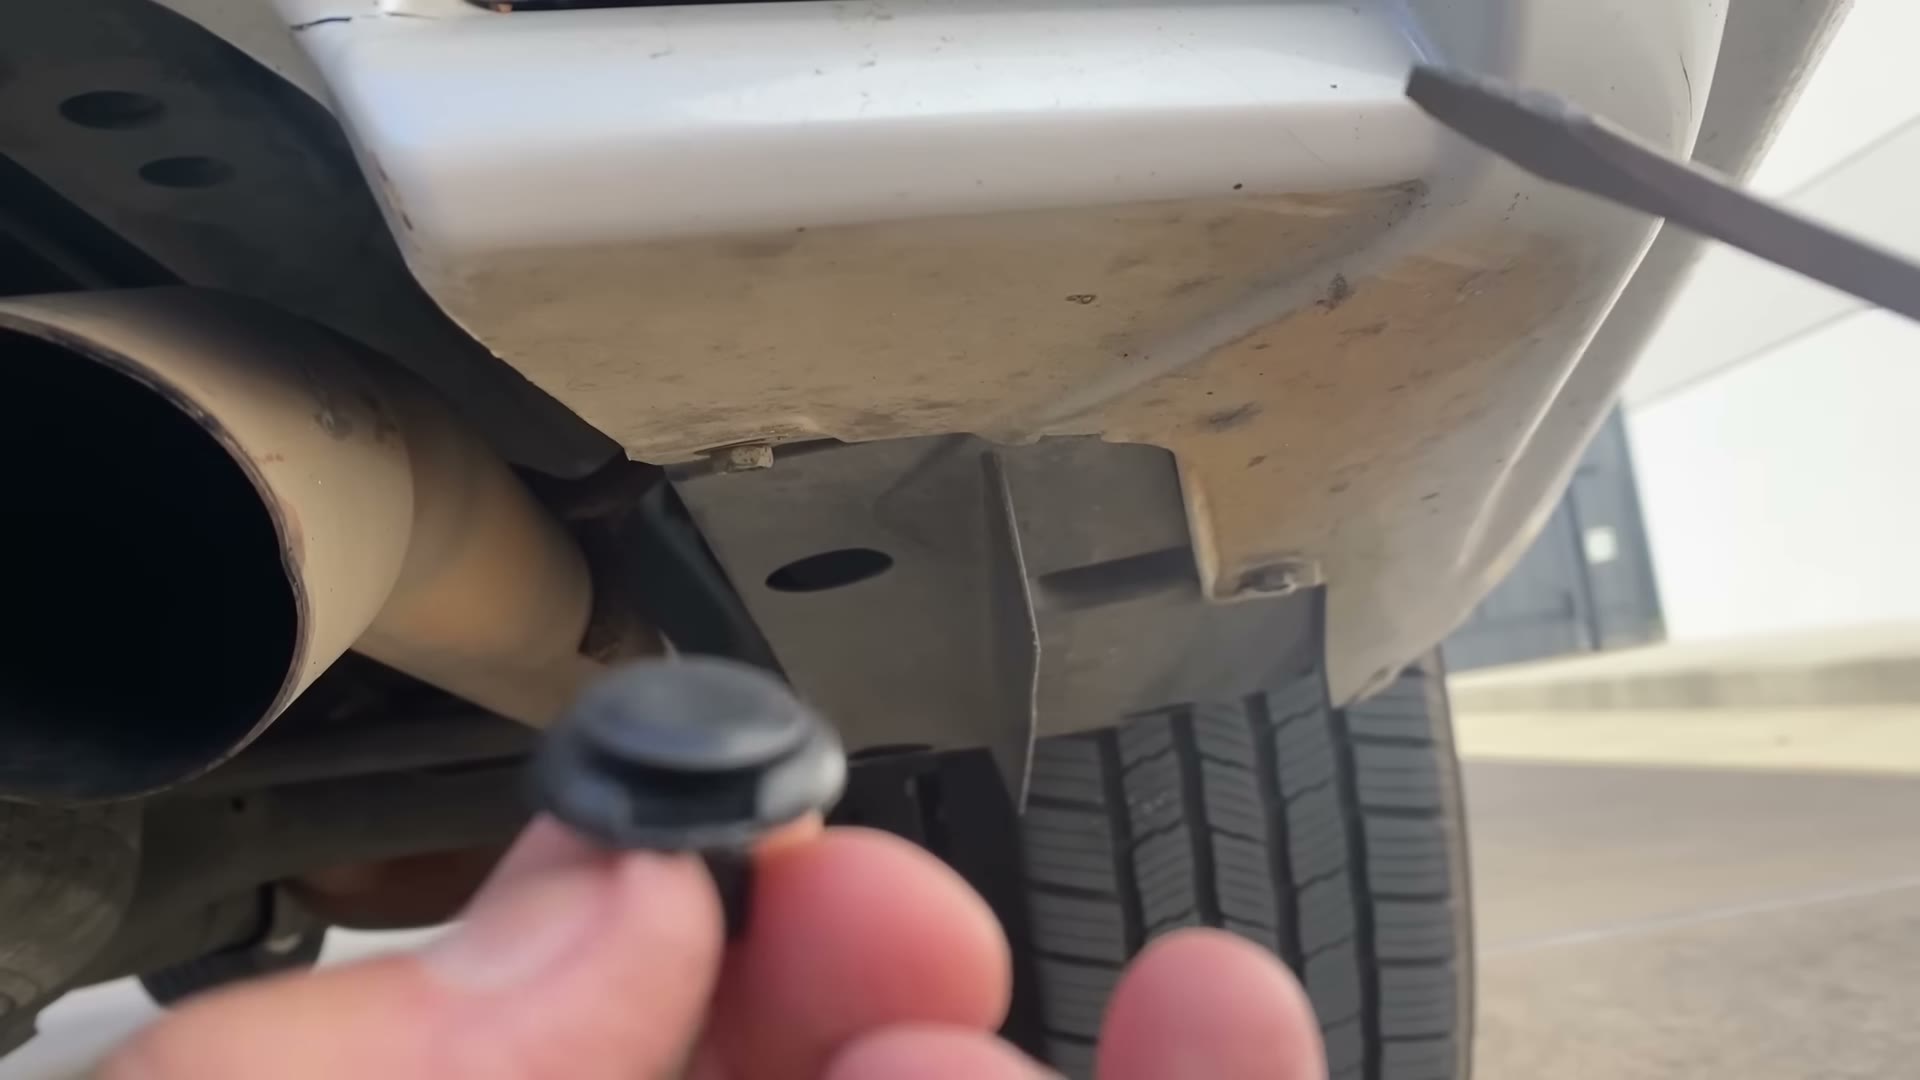
Our truck was already missing the pin at this corner, so this is one in hand to show what you are looking for.
2. Remove the two 10mm bolts at each bottom corner
At the same corner, two 10mm bolts run along the side of the bumper where it meets the metal bracket. The extension makes these much easier. Do both corners.
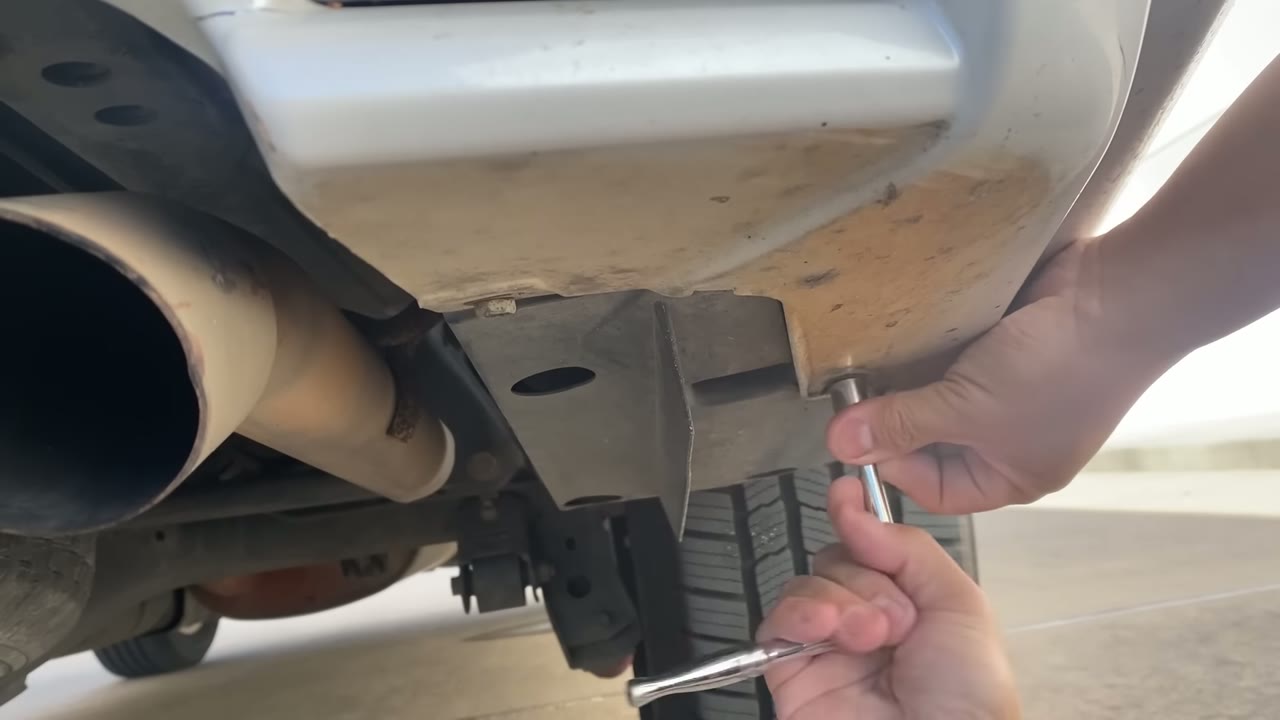
Socket and extension on a corner bolt, where the bumper meets the metal bracket behind the tire.
3. Remove the two 10mm bolts under the middle of the bumper
Lie down behind the truck and take out the two 10mm bolts under the middle of the bumper, one on each side of the hitch receiver.
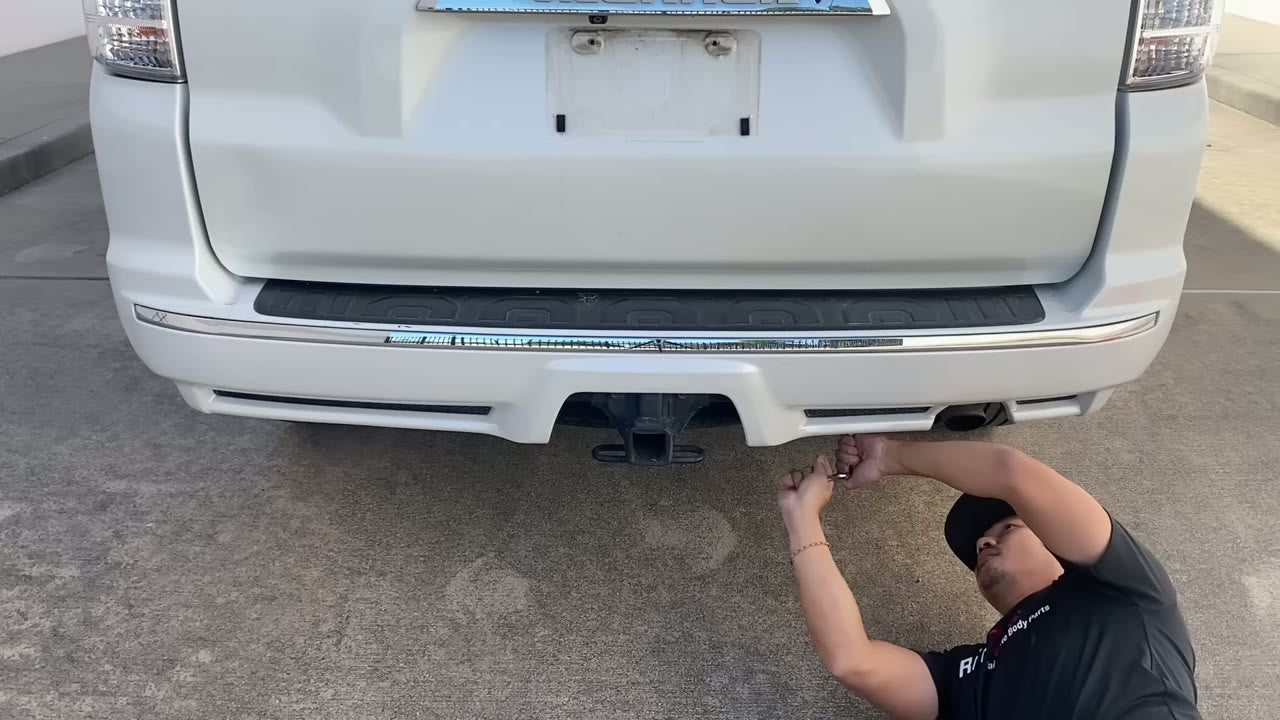
Working the middle bolts from the ground, between the hitch receiver and the exhaust tip.
4. Remove the 10mm bolt at the top of the wheel well
Inside the rear wheel well, look at the top of the arch where the bumper meets the quarter panel. There is one 10mm bolt there. Take it out first.
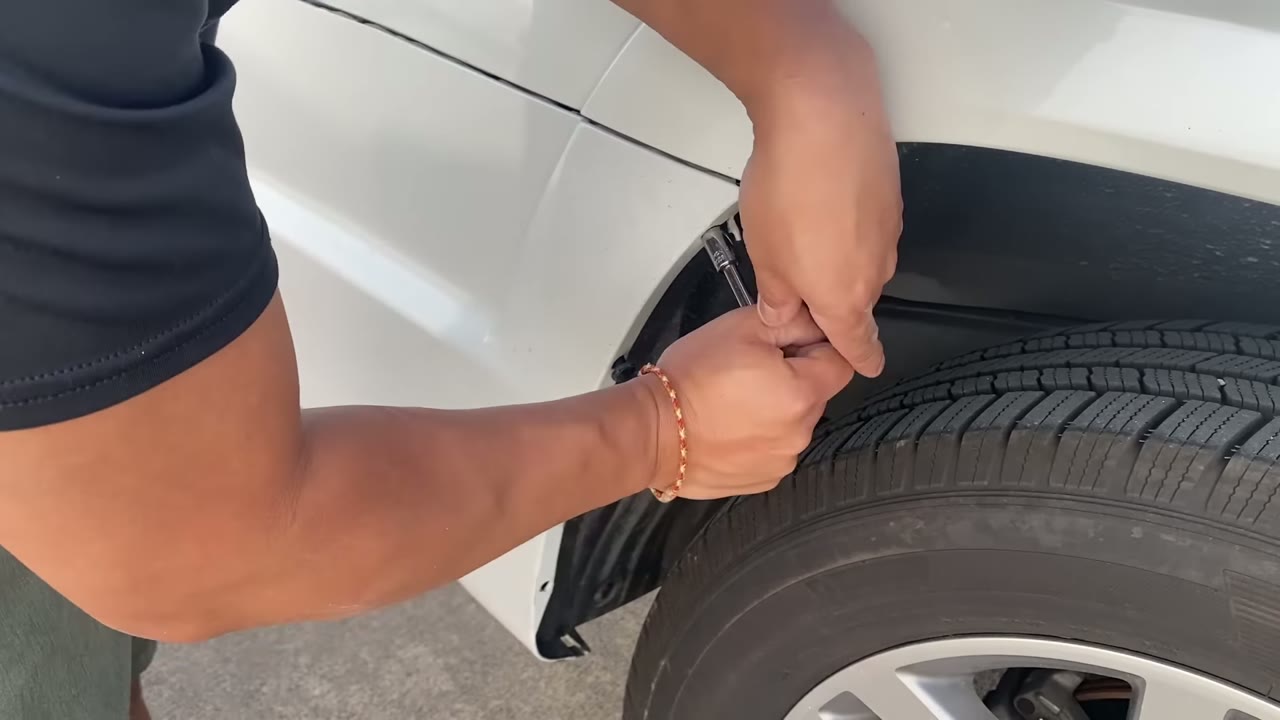
The top wheel-well bolt sits right at the seam between bumper and quarter panel.
Watch this step at 3:17 (the fasteners are pointed out at 3:02)
5. Pull the three push pins down the wheel well edge
Below that bolt, three push pins hold the edge of the bumper. Pry them out the same way as the bottom ones. Then do the same bolt and three pins in the other rear wheel well; the video works the passenger side and says the other side is the same.
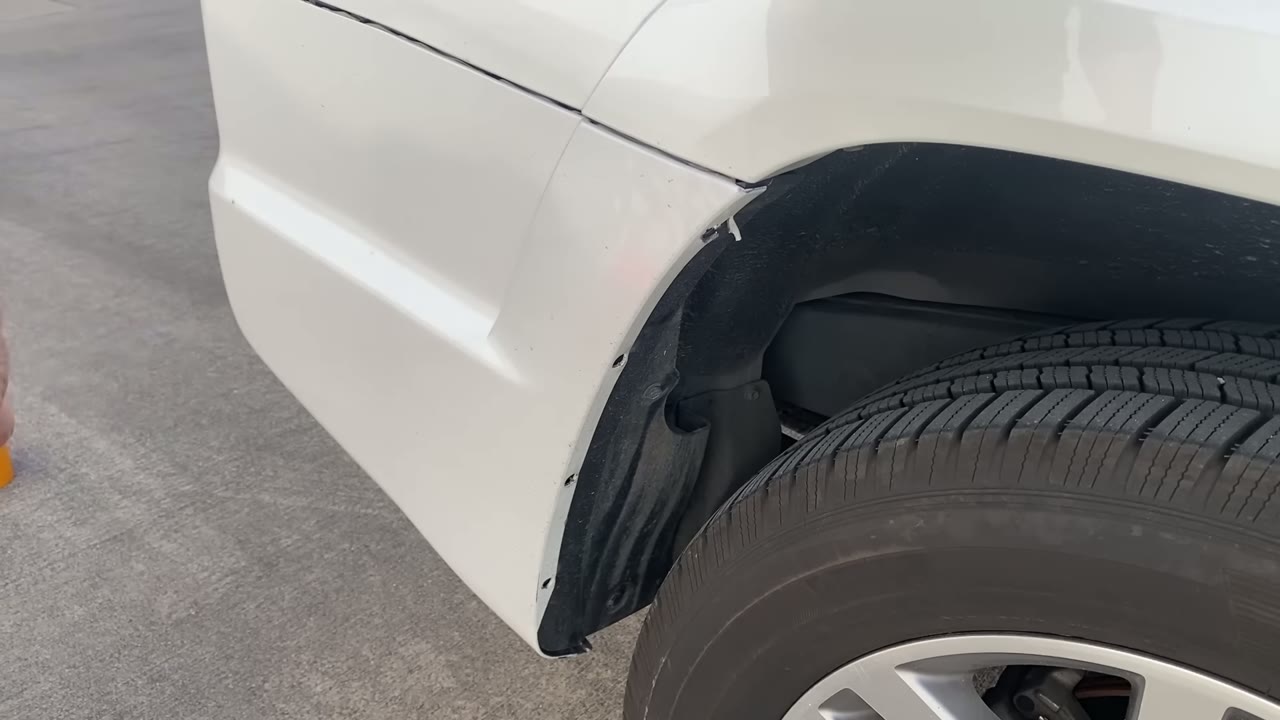
The same wheel well with the push pins out. You can see the empty holes down the bumper edge.
6. Open the liftgate and find the top bolts
Open the liftgate. There are eight 10mm bolts across the top of the bumper: one at each corner, tucked beside the taillight, and six along the sill above the black step pad.
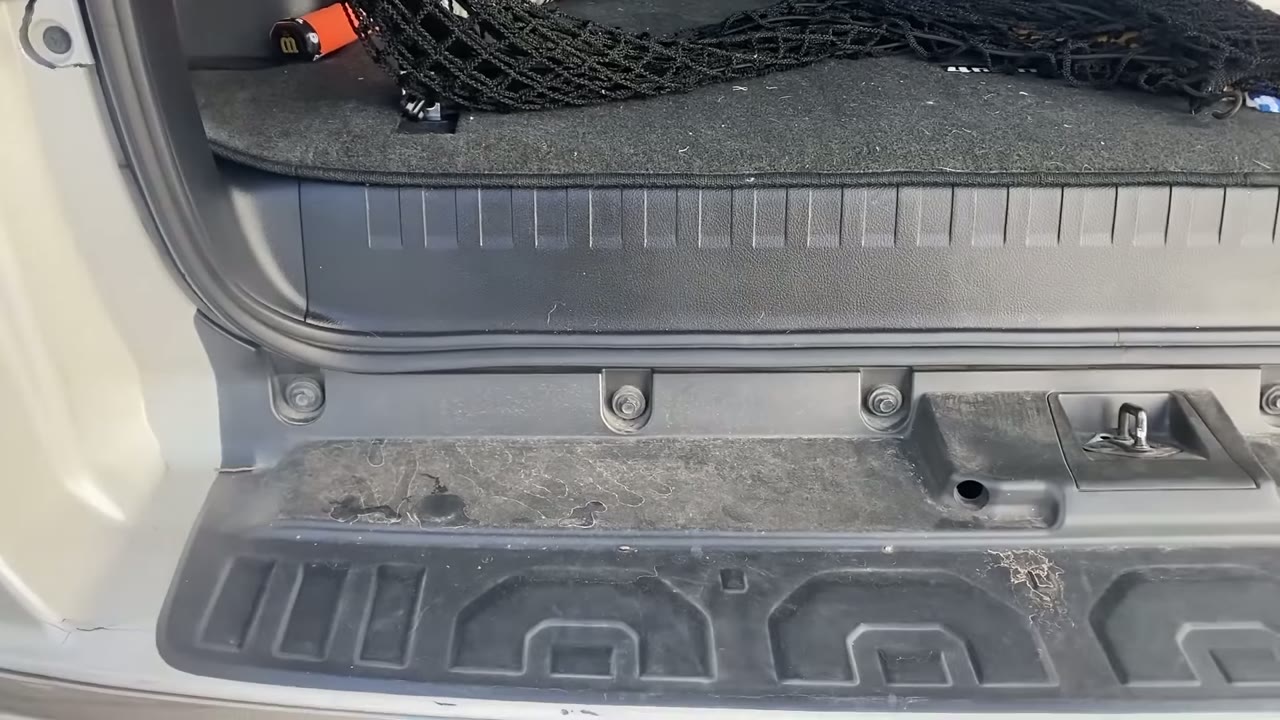
Part of the sill row. The metal hook at the right is the liftgate latch; remember it for step 10.
7. Remove the corner bolts and the sill bolts
Start at one corner beside the taillight, then work across the sill to the other corner. They are all 10mm. While you are up there, look at the mounts. On our truck one of them was completely broken, and as we say on camera at 4:17, that is when you know you need a new bumper.
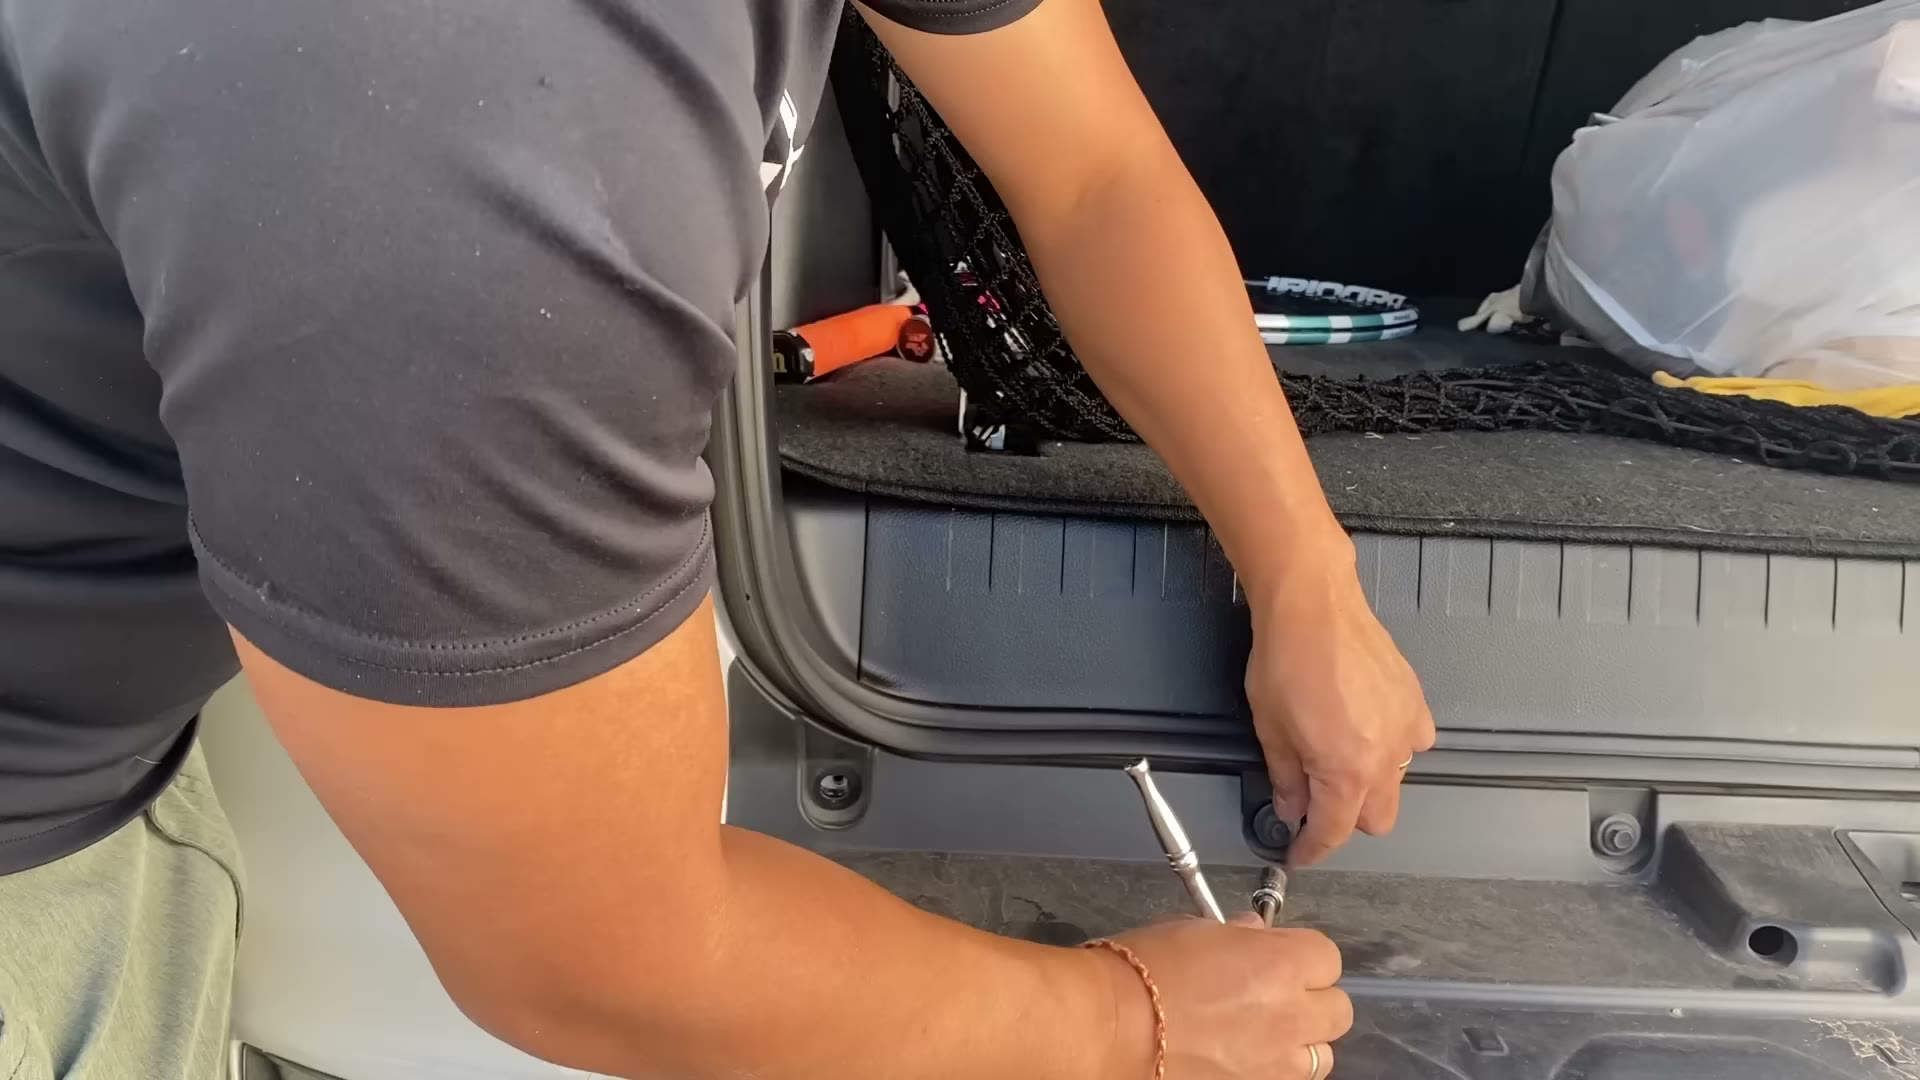
Working across the sill. The next bolts along the row are still in.
8. Take off the cover around the latch hook
In the middle of the sill, a black plastic cover sits around the liftgate latch hook. Slide it out and it comes right off.
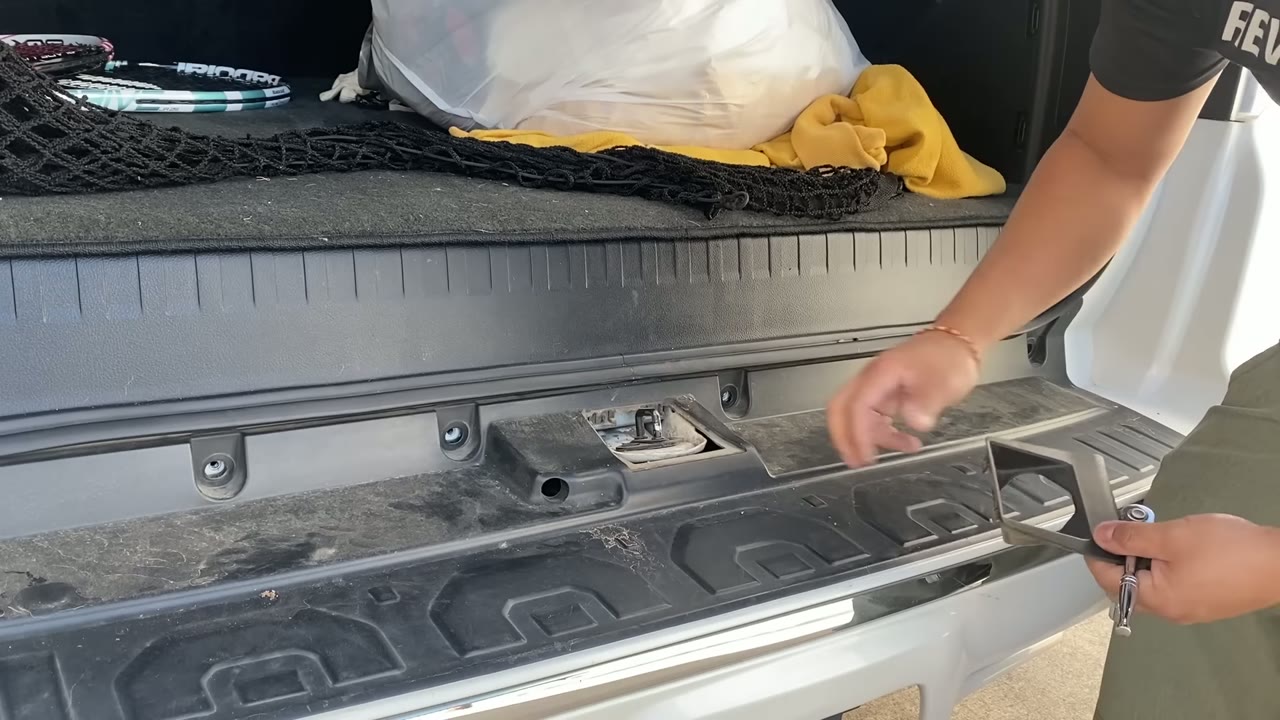
Cover off. The latch hook is exposed in the middle of the sill and the cover is in his hand at the right.
9. Pull the sides of the bumper away from the body
Grab one side of the bumper near the wheel arch and pull it outward, away from the quarter panel, until it lets go. Do the other side, then go to the middle. If either side is damaged, support the bumper while you pull (more on that below).
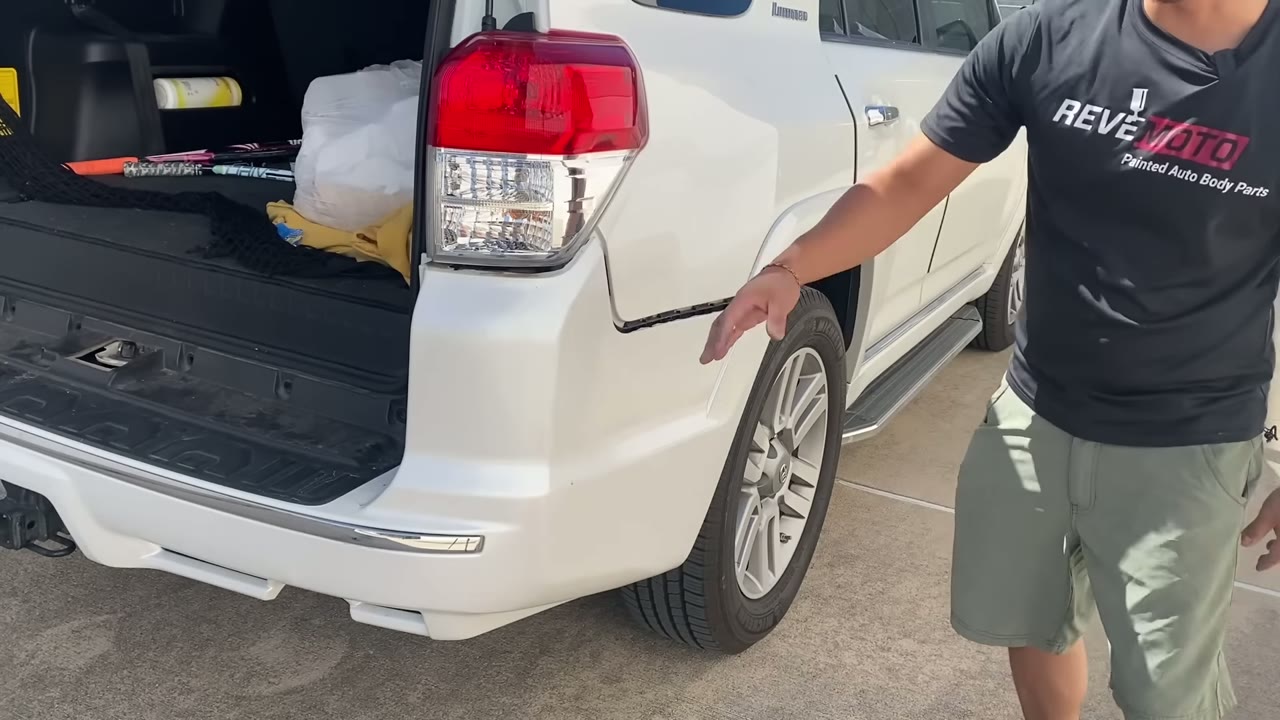
The side has released. Look at the gap that has opened along the seam above the rear wheel.
Watch this step at 6:19 (the warning about a damaged side starts at 5:45)
10. Lift the bumper over the latch hook and off
With both sides free, lift the center of the bumper up so its top edge clears the latch hook, then slide the whole thing back toward you. On our truck the hitch receiver stayed bolted on and the bumper came off around it.
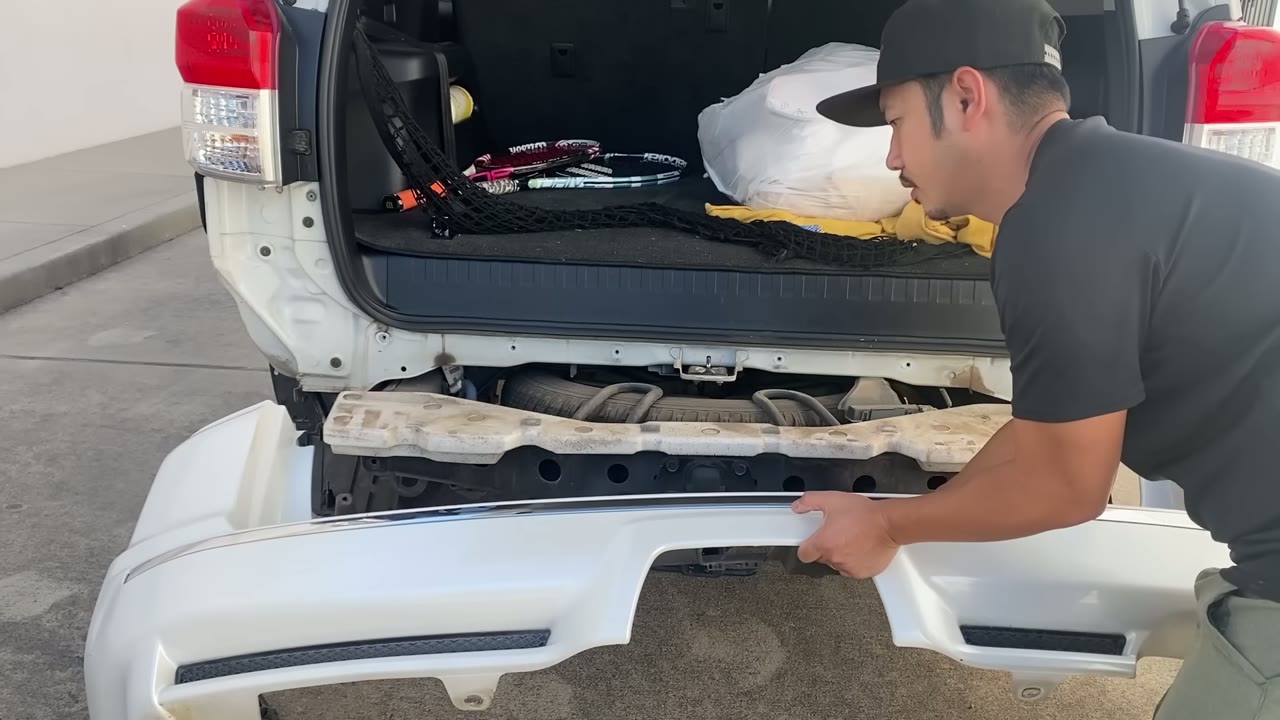
Off. Behind it you can see the beige impact absorber and the spare tire.
Two things that trip people up
The video calls out two: the liftgate latch hook, and a damaged bumper dropping before you are ready.
The latch hook. The liftgate latch hook sits in the middle of the sill, and the bumper has to go up and over it on the way off. Lift first, then pull back.
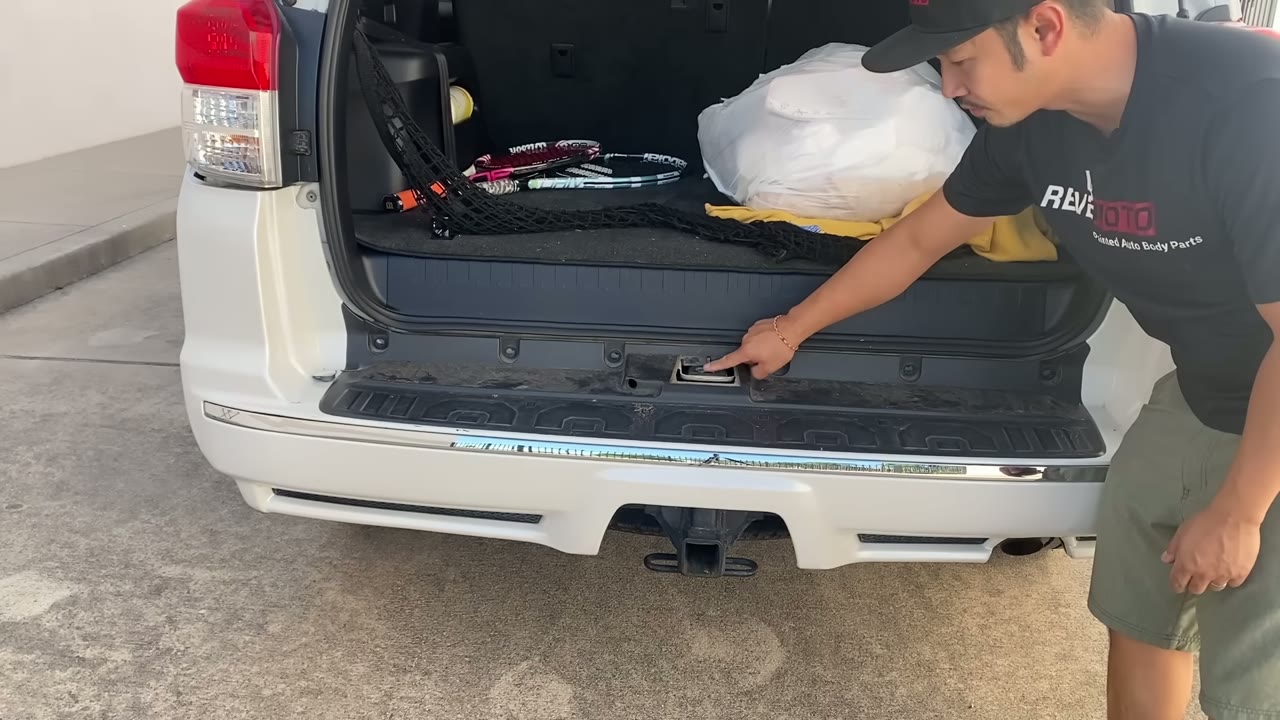
This is the hook. The bumper has to go up and over it.
A damaged bumper can fall. The truck in our video took most of its damage on the driver side, and that side was already hanging off before we touched it. Once the fasteners are out and you pull the good side, the whole bumper can drop. Have a hand under it, or a second person.
Putting the new bumper on
Installing the new bumper is the same job run backward: hook the top edge over the latch hook, seat the sides, then the sill bolts, the wheel wells and the bottom. The video stops once the old bumper is off, so watch it in reverse order and match each fastener to where it came out.
Which painted rear bumper fits your 4Runner?
We sell painted rear bumpers for 5th Gen 4Runners from 2010 to 2024 across three listings, split by trim, and every one is painted to your factory paint code. This video is attached to all three.
Pick by trim and by what your bumper has on it:
- 2014-on Limited, Nightshade and TRD Sport, or a 2010-2013 SR5 with chrome trim: the 2010-2023 4Runner rear bumper with molding strip and sensor holes.
- SR5 and Venture from 2014 on, no molding groove: the 2014-2024 SR5/Venture rear bumper.
- Trail and TRD models with the skid plate (except 2022-2023 Sport): the 2014-2024 Trail/TRD rear bumper.
If your year and trim are not named in one of those lines, start at our 4Runner painted bumpers page instead of guessing. Our guide to ordering a painted part correctly shows where to find your paint code. Please don't guess the code. Check the door jamb first; your dealer can also pull it from your VIN.
We have been matching factory colors for over 12 years, and you can read how in our paint match guarantee.
Frequently asked questions
Do I have to remove the trailer hitch to take off a 4Runner rear bumper?
No, not on the truck in our video. The hitch receiver stayed bolted to the frame and the bumper came off around it once every bolt and push pin was out and the top edge was lifted over the liftgate latch hook.
How many bolts and clips hold a 4Runner rear bumper on?
On the 2012 4Runner in our video, 16 10mm bolts and 8 push pins. Six bolts are underneath (two at each bottom corner, two in the middle), one is at the top of each rear wheel well, and eight run across the top under the liftgate. The pins are one at each bottom corner and three down each wheel well edge.
What size socket do you need for a 4Runner rear bumper?
A 10mm. Every bolt on the bumper in our video is 10mm, from the bottom corners to the sill under the liftgate. An extension helps with the bolts tucked up underneath.
Does this work on my 4Runner's year?
We filmed it on a 2012. ReveMoto attaches this same video to all three of our 5th Gen 4Runner rear bumper listings, which together cover 2010 to 2024. If your trim is not named on one of them, check the 4Runner painted bumpers page before you order.
Should I keep the old bolts and push pins?
Yes. Drop them in a box as they come out, because the new bumper goes back on with the same fasteners in the same places. Have a few spare push pins too: the truck in our video was already missing two.
Does the new bumper come painted and ready to install?
Yes. Our painted 4Runner rear bumpers ship painted to your factory paint code and ready to install, with no trip to a body shop for paint. They are backed by our Lifetime Paint Guarantee against peeling, fading and cracking; the details are on our painted auto information and warranty page.
---


