


How to Remove the Front Fender on a 4th Gen Toyota RAV4
Watch the full video on YouTube
To remove a RAV4 fender on a 2013-2018 model you need a 10mm socket on a ratchet, a regular extension and a long one, a utility knife and a flathead screwdriver. The headlight has to come out and the front bumper has to come loose at that corner before you start. Then the fender is held by bolts in the wheel well, in the door opening, at the two top corners, under the hood and at the front, all 10mm, and it pulls off once they are out.
We filmed this on a customer's 2015 RAV4 after an accident, working the passenger side. The video runs 10 minutes 50 seconds. Every step below links to its moment in it, so you can jump to the bolt you can't find.
What tools do you need to remove a RAV4 fender?
A 10mm socket on a ratchet takes out every bolt on the fender. Add an extension, a long extension for the bolt hidden behind the liner, a utility knife for the liner push pins and a flathead for the clips under the hood.
- 10mm socket and ratchet
- A regular extension, and a long one (you'll see it held up at 5:50)
- Utility knife, for cutting the liner push pins
- Flathead screwdriver
- New push pins from the dealer, since you're cutting the old ones
Rolando says more than once that these bolts are tiny. Put them in a cup as they come out.
What has to come off before the fender?
The headlight comes out, and the front bumper has to come loose at that corner. "You don't have to take the bumper completely off," Rolando says at 0:42, "but you do have to remove it off the side." The bumper is bolted at the fender, and the last two fender bolts sit in the space the headlight leaves.
Our fender video doesn't show that part; the headlight and bumper were already off for the insurance adjuster. We have separate videos for it. On a 2013-2015, use our 2013-2015 RAV4 headlight video and our 2013-2015 RAV4 front bumper cover video. On a 2016-2018, the front end changed, so use our 2018 RAV4 fender video, which takes the headlight out first (0:30 to 3:13), and our 2018 RAV4 front bumper video.
Where are the bolts on a 2013-2018 RAV4 fender?
The bolts holding a 2013-2018 RAV4 fender are all 10mm. Rolando names the size everywhere except under the hood, and our 2018 RAV4 video calls those 10mm too. They sit in eight places, listed here in the order you take them out.
In the wheel well, the liner is held by 10mm bolts at two spots on the back edge of the arch, one low by the door and one partway up, plus plastic push pins around the opening. The wheel arch molding comes off next. It's only clipped on, and there's a 10mm at the bottom of the fender that the molding was hiding.
Behind the liner, at the back of the wheel well, a plastic piece covers one more 10mm. That one needs the long extension.
With the front door open there's a 10mm behind the back edge of the fender. Up top, the corner by the mirror has a small triangle cover with a 10mm under it. The corner where the fender meets the windshield has its own cover and another 10mm.
Under the hood a long plastic cover runs along the fender's top edge. With it off, our car shows three bolt heads along that edge, and Rolando takes out two of them. The last two bolts are at the front of the fender, in the space the headlight left.
How do you remove a RAV4 fender, step by step?
Start in the wheel well and work up and forward: liner and molding, the bottom bolt, the hidden bolt and the door opening, the top corners, under the hood, then the front. Pull the fender when nothing is left holding it.
The wheel well liner and molding
1. Take out the 10mm bolts at the back of the liner
The liner bolts are on the back edge of the front wheel opening, in two spots. "Over here is going to be your 10 mm bolts," Rolando says at 1:04, pointing low on the back of the liner, by the door. Then at 1:12: "up right here going to be a 10," partway up the same edge. Take out both.
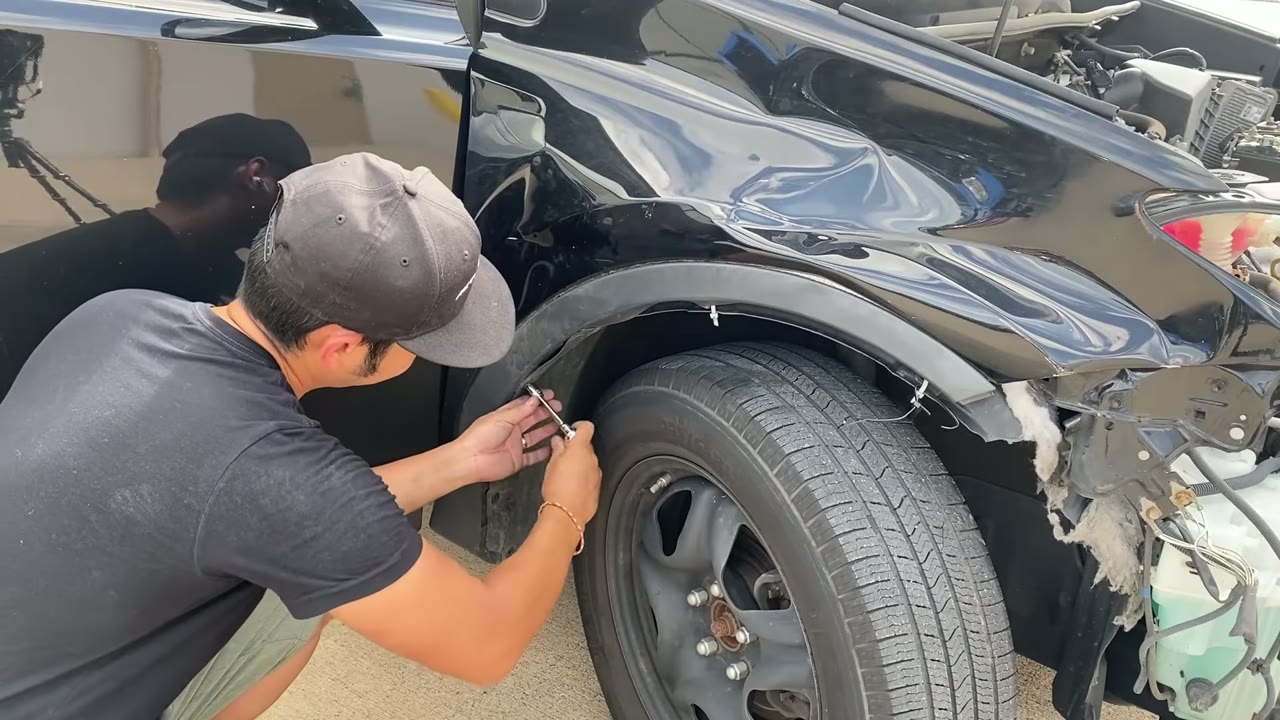
Socket and short extension, turned by hand, on the liner bolt partway up the back edge of the arch.
2. Cut the liner push pins
The liner is also held by plastic push pins around the opening. You can try prying them with a flathead. Rolando calls that "really hard," cuts them off with a utility knife instead, and gets new ones at the dealership. Don't bother trying to save them; in our 2018 RAV4 video we call them "one time use." If the tire is in your way, turn the steering wheel (he does at 2:30).
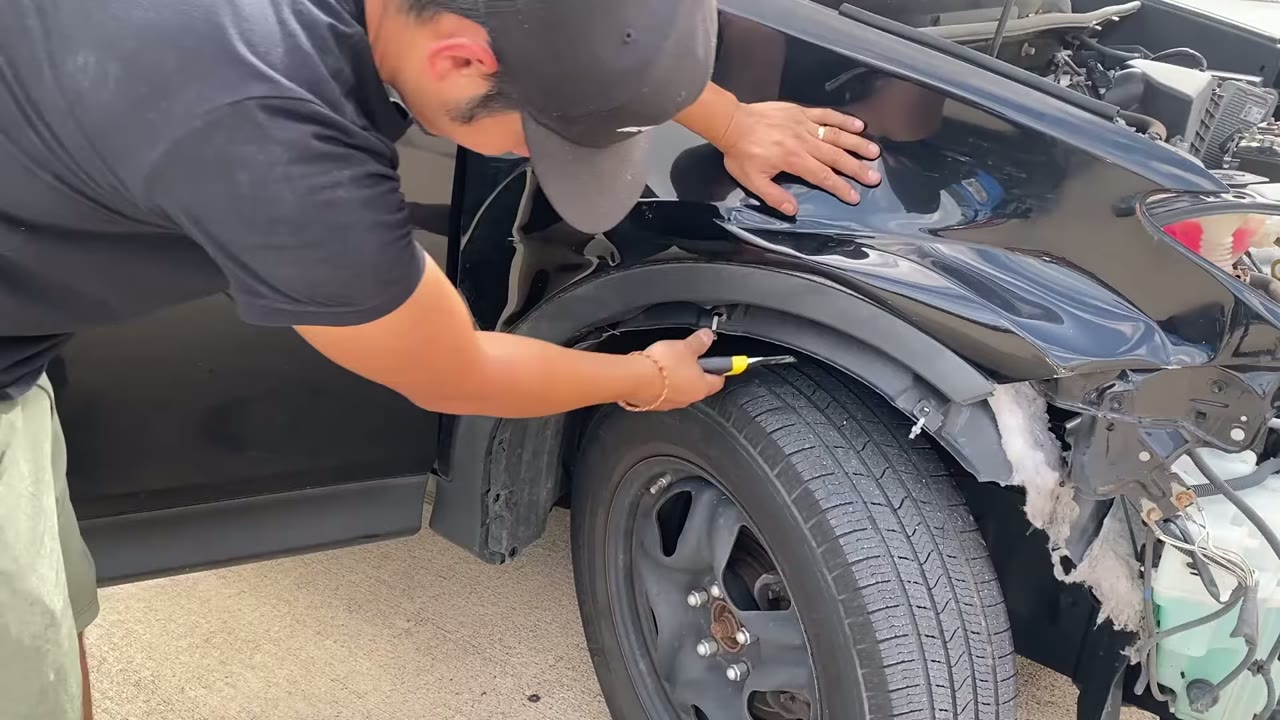
Working the knife in under the arch, next to one of the white pins.
Watch this step at 1:31 (he explains why he cuts them at 0:47)
3. Pull off the wheel arch molding
The black plastic molding around the wheel opening, which Rolando calls the fender garnish, is "all just held on by clips." Pull it away from the fender and it comes off in one piece. Look underneath too. He says there may be one more push pin at the bottom; his car didn't have it.
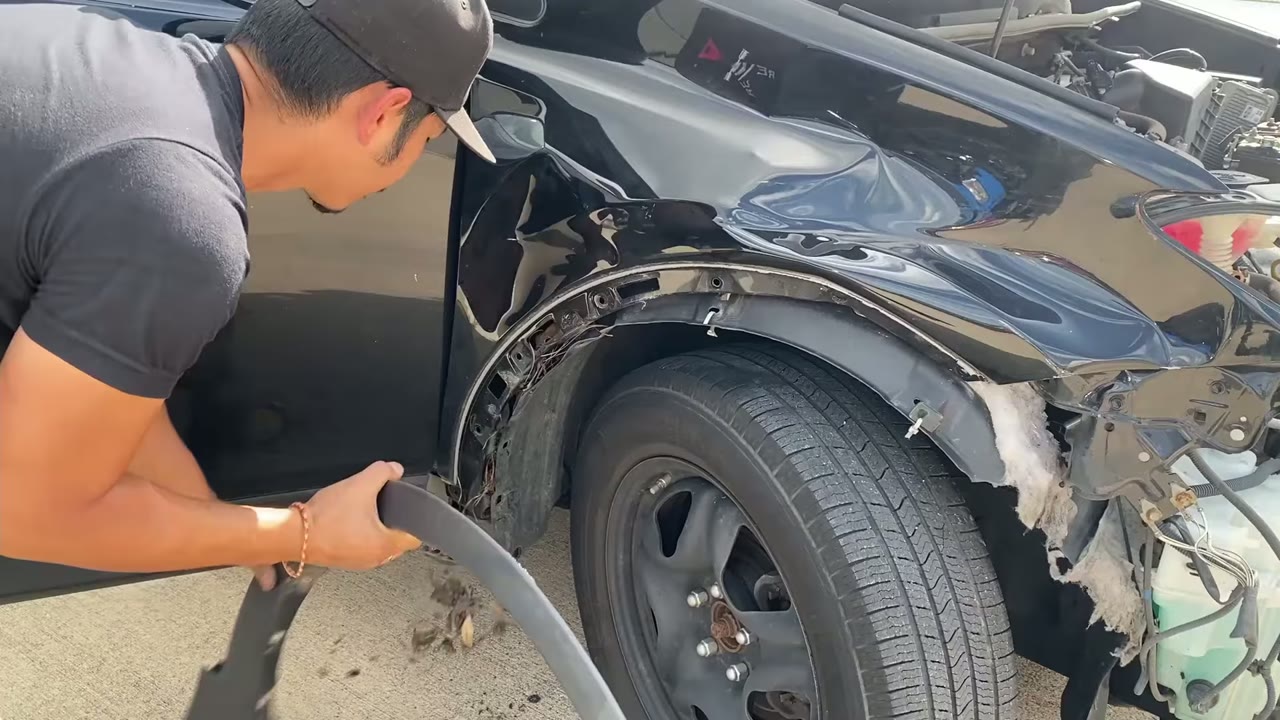
The molding coming off. The row of clip holes along the arch is where it was.
The bottom bolt
4. Remove the 10mm bolt the molding was covering
"Once you pull that fender garnish off, there's going to be a 10 mm right there." It's at the very bottom of the fender, just behind the front tire.
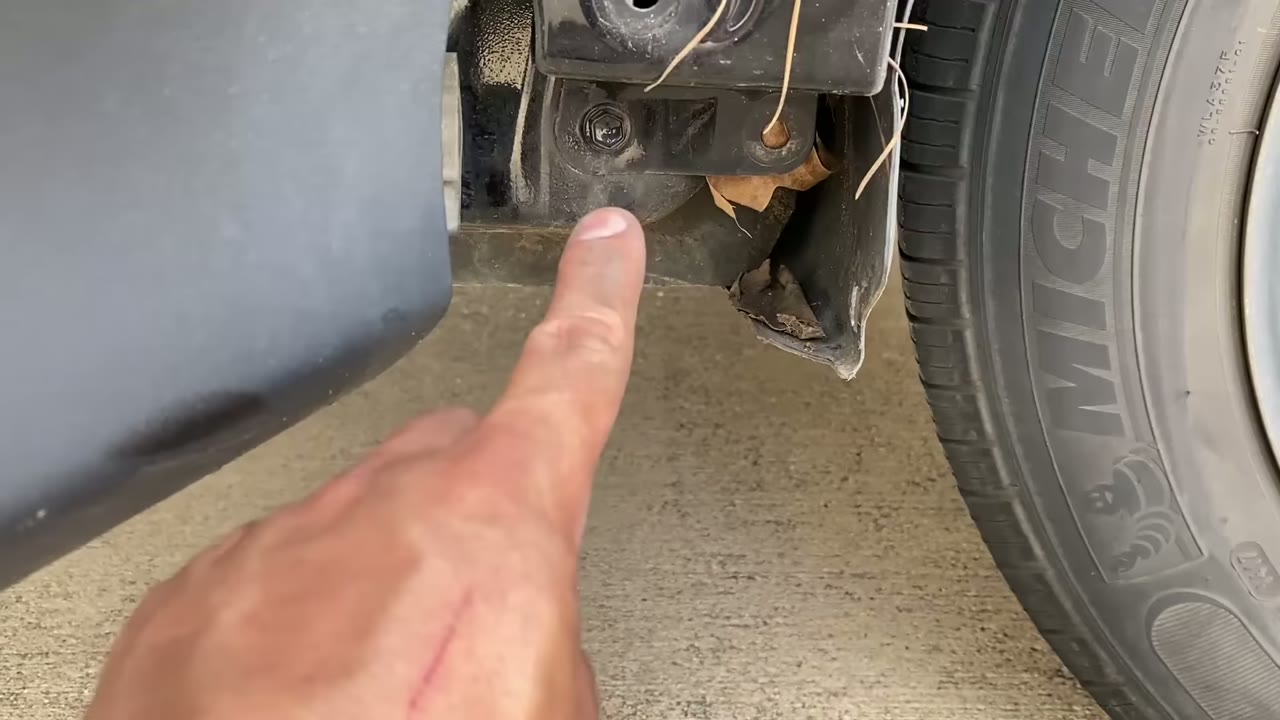
The bottom bolt, next to the tire. The molding was covering it.
Behind the liner and in the door opening
5. Pull out the plastic piece behind the liner
Pull the back of the liner to the side. Behind it is a plastic piece held on with push pins. Pull it hard and it comes out.
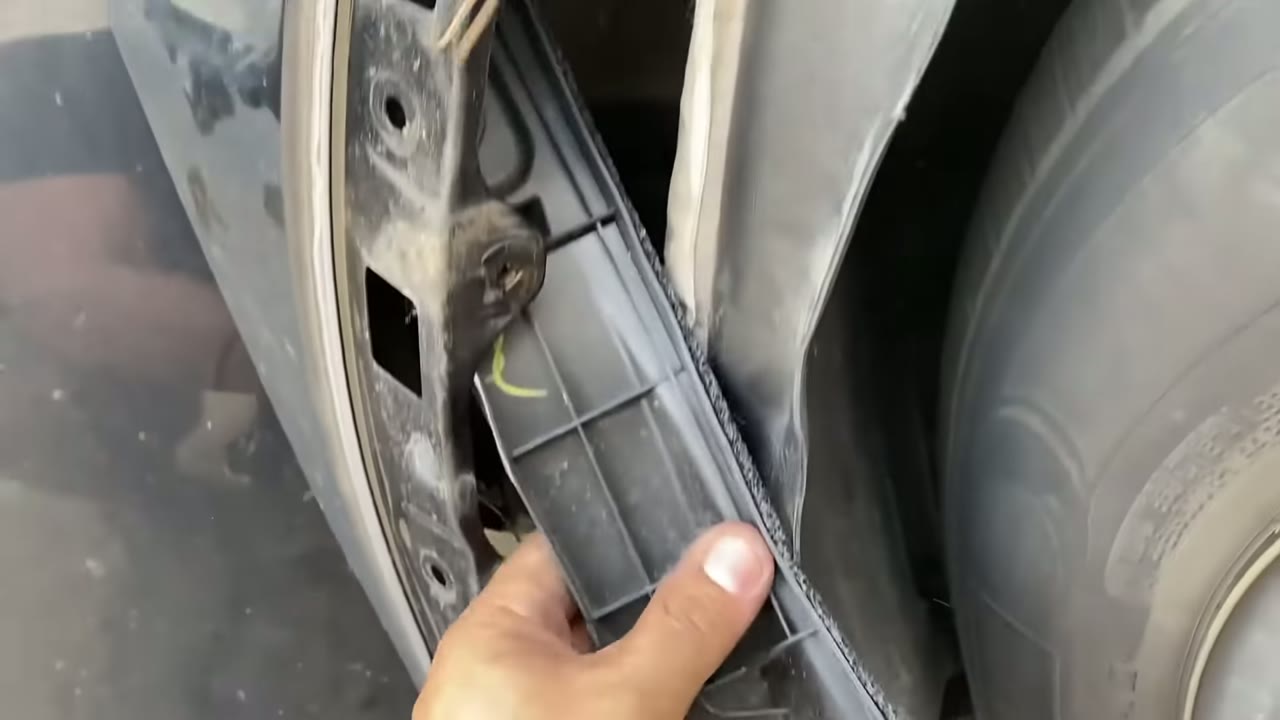
The plastic piece coming out from behind the liner.
6. Take out the hidden 10mm bolt with a long extension
This is the bolt that's easy to miss. Rolando comes back for it partway through the video: "I looked at the vehicle, you actually have to go inside the fender liner." With the plastic piece out, there's a 10mm down at the bottom, behind the liner. You need a long extension to reach it. In our 2018 RAV4 video this same bolt dropped when it came loose (11:14 in that video), so expect to fish for it.
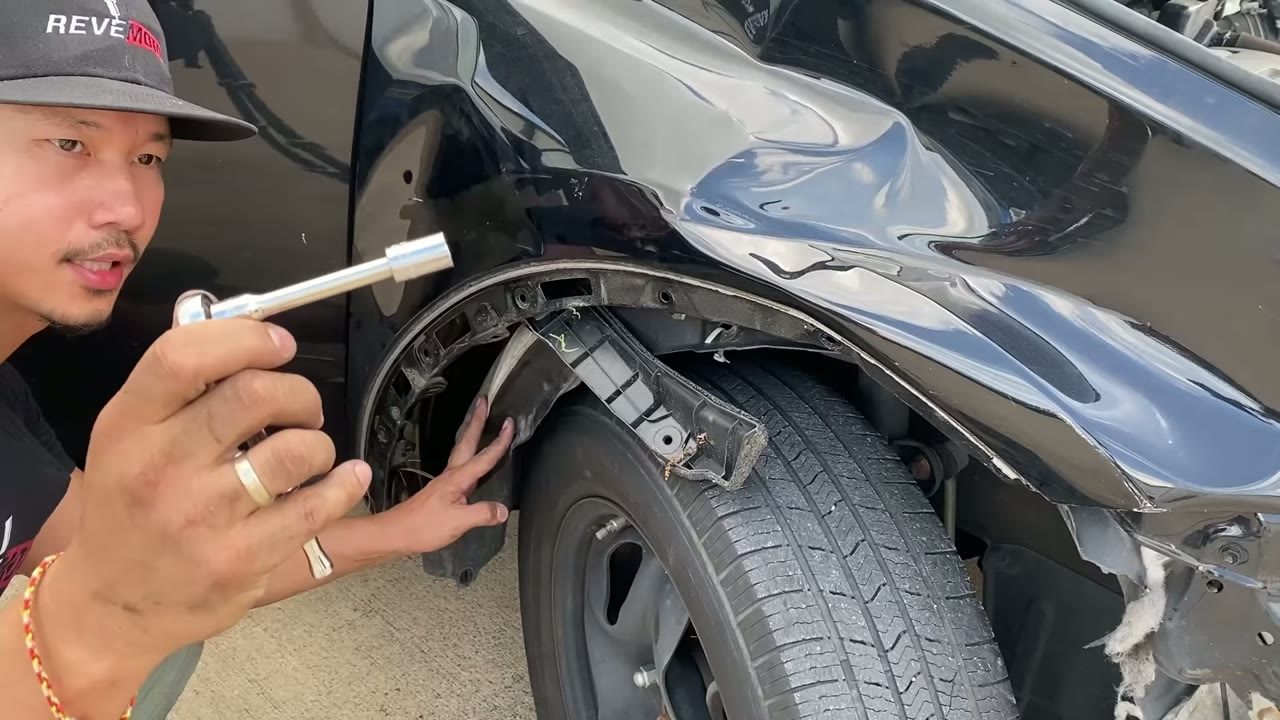
The long extension he uses to reach the bolt behind the liner.
7. Remove the bolt in the door opening
Open the front door. Behind the back edge of the fender, in the gap above the lower hinge, there's another 10mm. Use the extension. "Man, these bolts are tiny," Rolando says here.
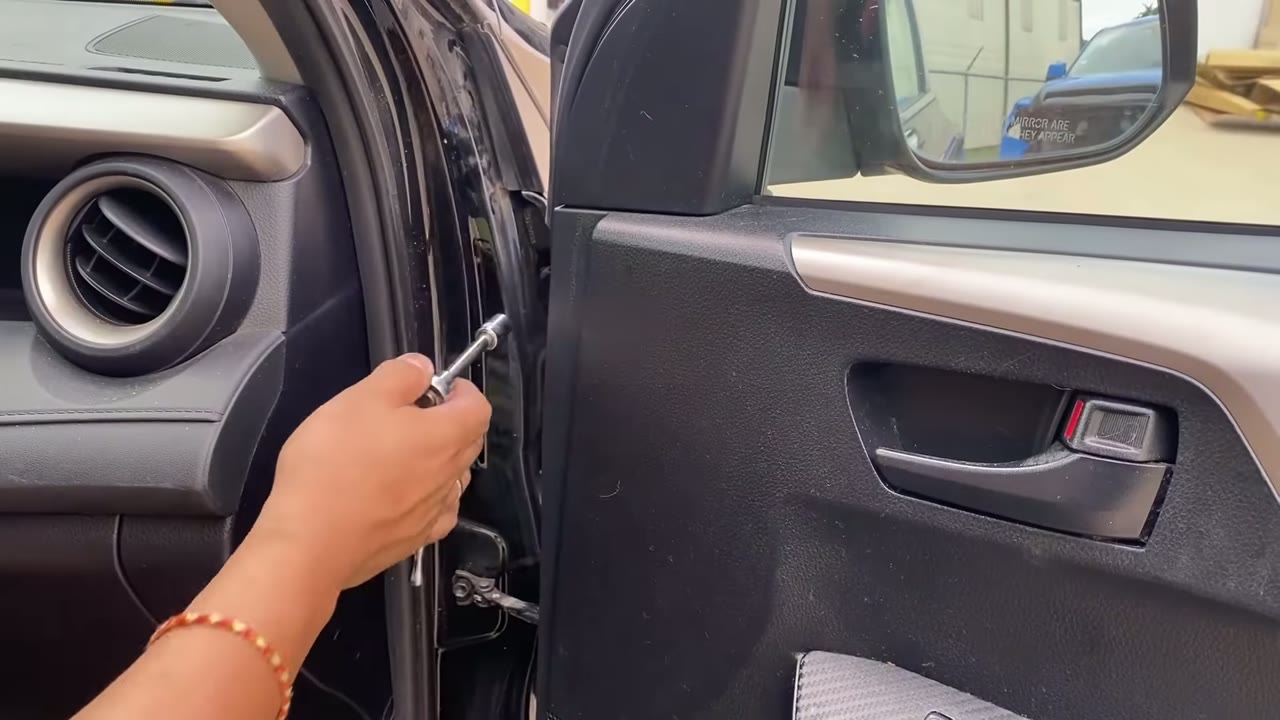
Door open, socket going into the gap behind the fender.
The top corners
8. Pop the triangle cover by the mirror and remove the bolt under it
At the top back corner of the fender, next to the side mirror, there's a small triangle cover. Pull it off with your fingers. The one on our car had three white clips on the back. There's a 10mm under it.
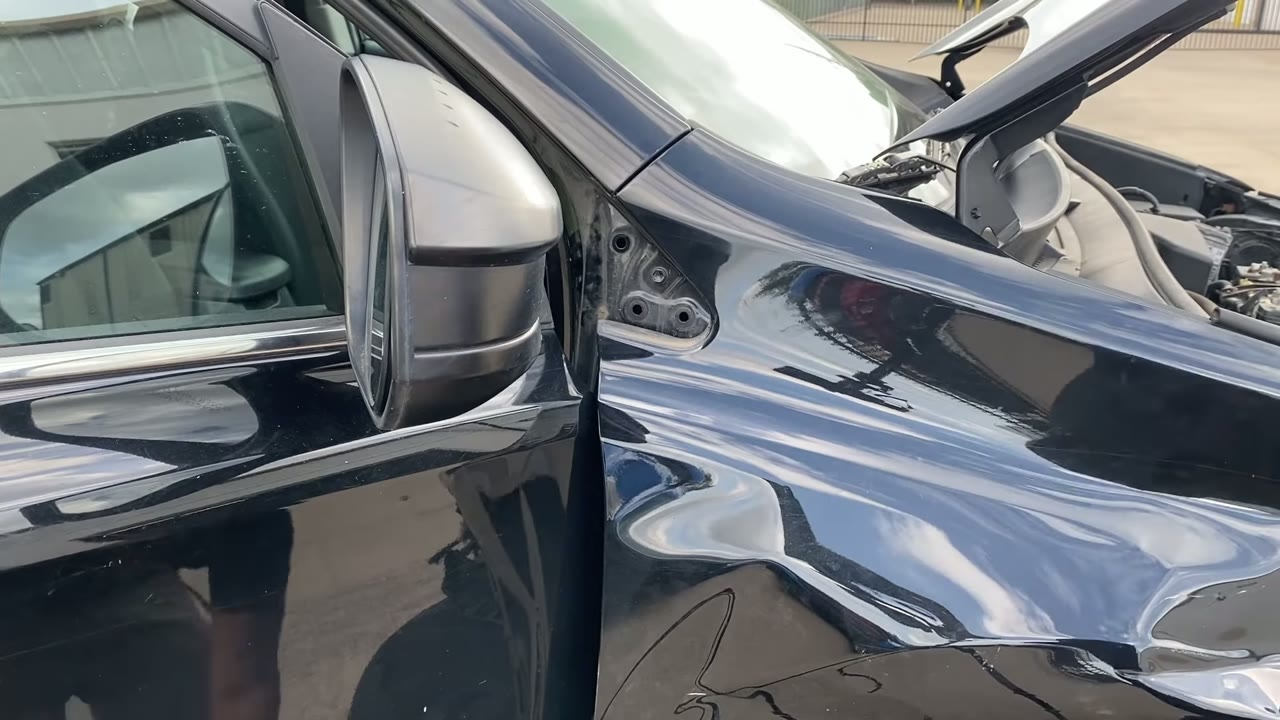
The corner beside the mirror with the cover off: one bolt in the middle, and the three holes the cover's clips sat in.
9. Remove the cover at the windshield corner and the bolt under it
Where the top of the fender meets the base of the windshield there's another cover. Pull it to the side and it comes right off. The bolt under it is hard to see ("you can barely see it"). It's another 10mm.
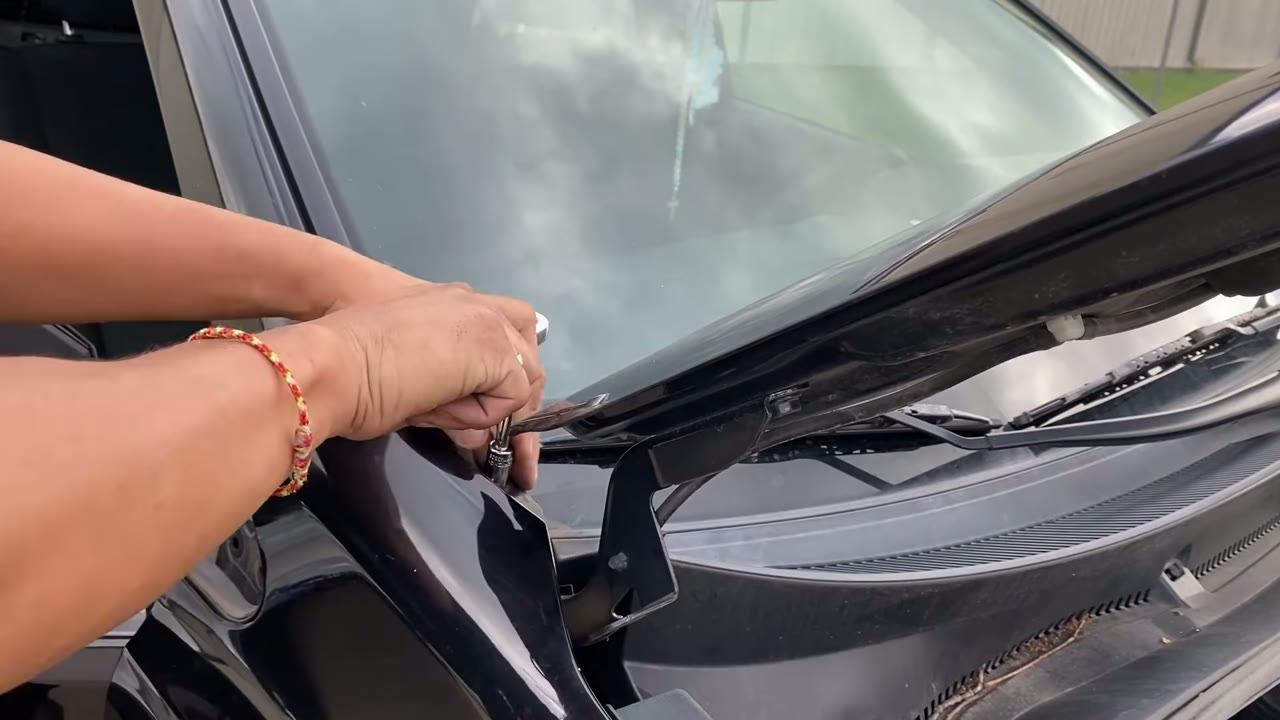
Socket on the windshield-corner bolt, cover already off.
Under the hood
10. Lift off the cover along the top of the fender
With the hood up, a long plastic cover runs along the inside top edge of the fender toward the windshield. Pry its clips up with the flathead and lift it off.
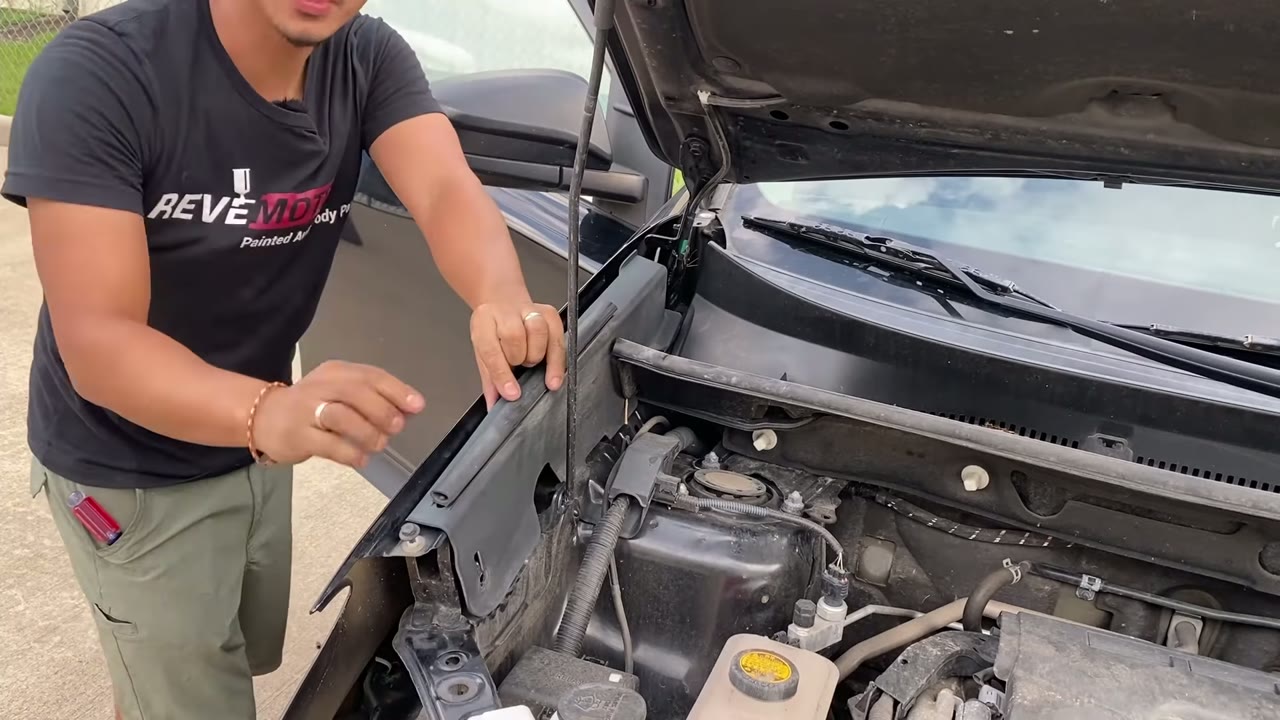
The long cover along the fender's top edge, coming up.
11. Remove the bolts along the top edge
With the cover off you'll see three bolt heads along the top edge of the fender: one at the back end near the windshield, one in the middle, and one with a washer at the front end. Rolando counts "one and two" and takes out the back and middle ones. The washer bolt is still in when he moves to the front of the car, and the video never shows what it holds. Our 2018 RAV4 video shows three bolts along this same edge. Check the washer bolt at the front end before you try to pull the fender.
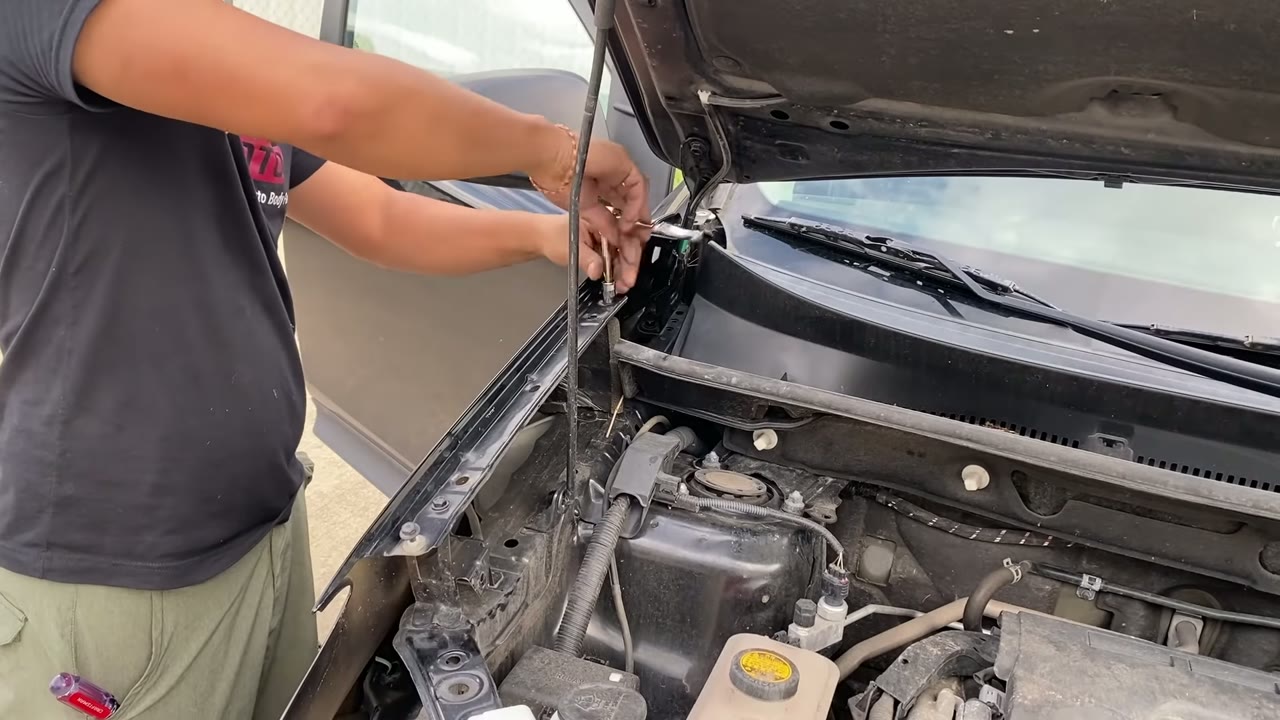
Cover off, socket on the bolt at the back end of the top edge. The washer bolt is at lower left, at the front end.
The front corner
12. Remove the two bolts at the front
The last two bolts are at the front of the fender, low, in the space the headlight and bumper corner left. "The last bolt is going to be right there," Rolando says, takes it with the 10mm, then calls out "number two."
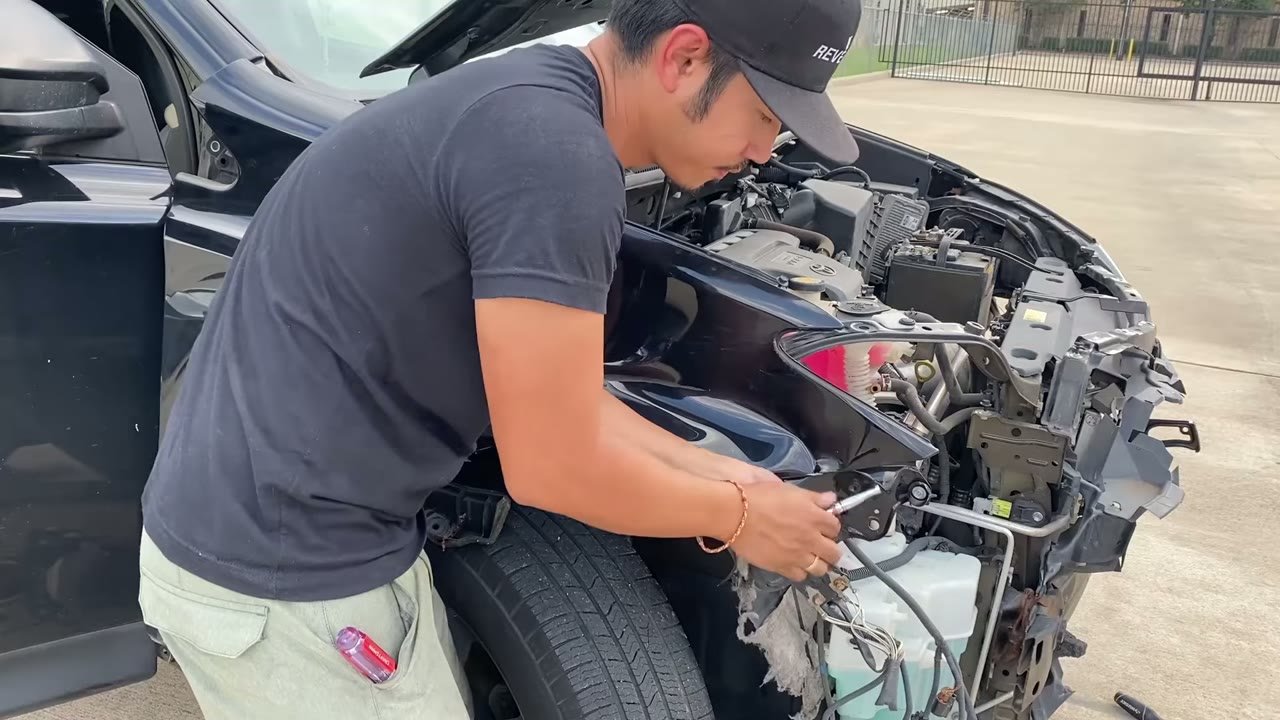
Working the front bolts, low, where the headlight used to sit.
Pulling the fender
13. Pull the fender off
With every bolt out, pull the fender away from the body. Rolando lifts it with one hand at the top back corner and one at the wheel arch.
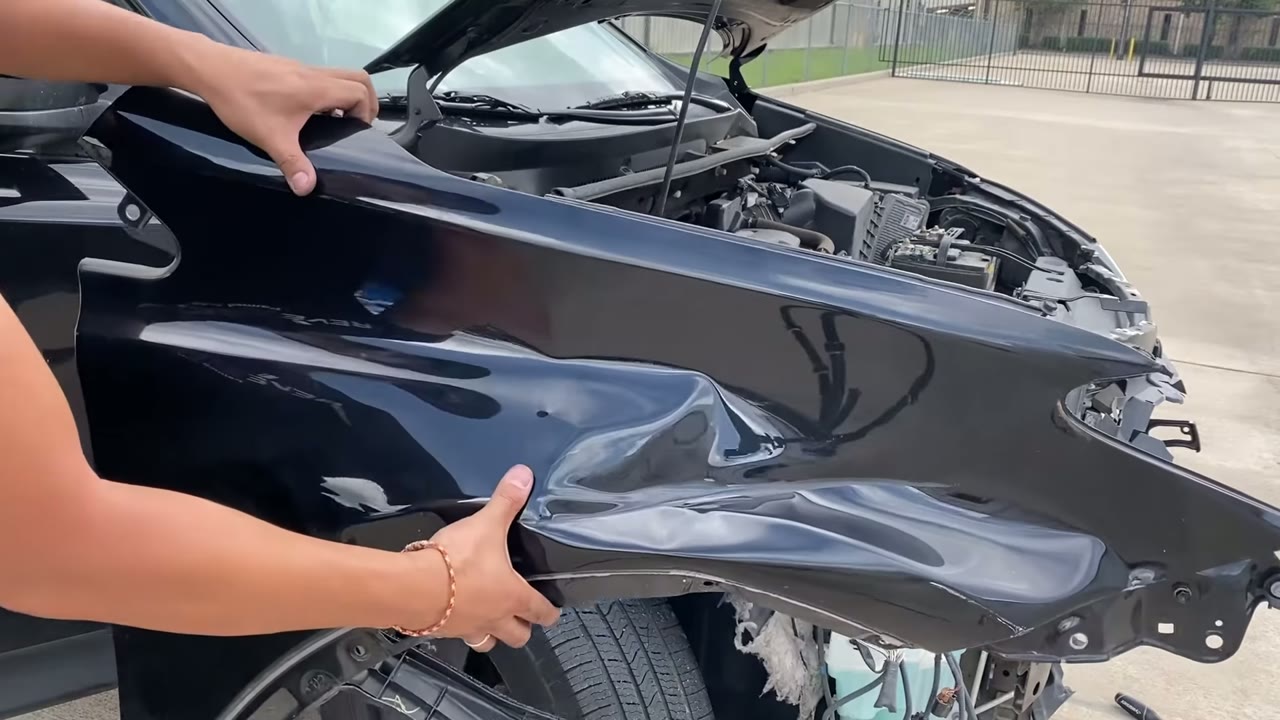
The dent across the middle of the fender is the accident damage this customer's RAV4 came in with.
Putting the new fender on
Install is the same list run backward: front bolts, the top edge, the two top corners and their covers, the door opening, the hidden bolt behind the liner and its plastic piece, the bottom bolt, then the molding and the liner. The video stops once the old fender is off, so use it in reverse and match each bolt to where it came out. Put the liner back with new push pins from the dealer, since the old ones were cut.
Which painted fender fits your RAV4?
The same fender covers every year from 2013 to 2018; what changes is the side and where your RAV4 was built. That makes four different fenders, each with its own OEM part number printed on its listing, and this video is attached to all four. Each is painted to your factory paint code, which you pick from the listing's menu of 2013-2018 RAV4 colors.
- Passenger side, Canada/US built, part number 538010R070: 2013-2018 RAV4 passenger-side fender (Canada/US built)
- Passenger side, Japan built, part number 5380142170: 2013-2018 RAV4 passenger-side fender (Japan built)
- Driver side, Canada/US built, part number 538020R050: 2013-2018 RAV4 driver-side fender (Canada/US built)
- Driver side, Japan built, part number 5380242200: 2013-2018 RAV4 driver-side fender (Japan built)
Each listing offers an OEM or an aftermarket version, both with the holes for the wheel arch molding. If you aren't sure where your RAV4 was built, our guide to ordering a painted part correctly says to have your dealer confirm the part number from your VIN. Ask for the fender part number and match it to the list above. The same guide covers finding your paint code. Please don't guess it.
Frequently asked questions
Do I have to take the front bumper off to remove a RAV4 fender?
Not all the way. On the 2015 RAV4 in our video, Rolando says you don't have to take the bumper completely off, but you do have to free it at the side of the fender. The headlight has to come out too; the last two fender bolts sit in the space it leaves.
What size are the bolts on a RAV4 fender?
10mm. Rolando calls out 10mm for the liner bolts, the bottom bolt, the hidden bolt behind the liner, the door opening, both top corners and the front. He doesn't say a size for the bolts along the top edge under the hood; our 2018 RAV4 video calls those 10mm. A long extension is needed for the bolt behind the liner.
Does a 2016-2018 RAV4 use the same fender as a 2013-2015?
Yes. All four of our 4th Gen RAV4 fender listings fit every year from 2013 to 2018, and they're split by side and by where the vehicle was built, not by year. We also filmed a 2018 RAV4 passenger fender coming off, and the bolts are in the same places: the liner, behind the molding, behind the liner, the top corner and under the hood. The headlight and front bumper are different on 2016-2018, so use our 2018 videos for those.
Will a painted fender match the rest of my RAV4?
We paint each fender to your factory paint code, and it's backed by our paint match guarantee. The guarantee has one exception: the car can't have been repainted before, including an earlier accident repair, because body shops usually blend paint onto the panels next to the one they fix. If yours has been repainted, read our paint match guarantee before you order. The same page has a section on sending in a paint sample.
---


